16Footer


Feb' 17

7

1208 House Tour


Park Slope

I know this doesn't look like anything impressive and is far from the majestic brownstone townhouse you pictured in your head, but this bad boy took us a year to find!  We've seen countless townhouses (20+) in various neighborhoods (bed-stuy, crown heights, park slope, south slope...etc) and in all kinds of doneness (from totally hoarder gross to turn-key ready), we just couldn't find anything that offers both good location and value. Until now....it's time to pack the baby and the cat!


Open House

Can't have a renovation blog without the before photos. These were the pictures we took on our first house tour..

IMG_4062.JPG

3rd Floor Bedroom

Tilted floor and tiny windows

IMG_4064.JPG

3rd Floor Bedroom

Plenty of closet space at the least.  Our lovely agent Kirsty patiently stood by while we gushed

IMG_4065.JPG

Stairway to the 3rd Floor

The retro pattern carpeted stairways and the 80s pebble stucco paint, with walls blocking any natural lights created dark segregated space

IMG_4067.JPG

Stairs to the Parlor

Seems dark, but the window should help. Again the walls created a dark section in the house.  Will have to open up the walls later.

IMG_4068.JPG

Front Section of the Parlor

The 12 feet ceiling height of the typical parlor space wasn't being utilized fully here.  The parlor floor was sectioned into smaller rooms and the height was masked under the 80s pebble stucco with dropped ceiling. So much potential!

IMG_4069.JPG

Parlor Windows

The room will get so much more light coming in just with the right size windows and better window treatments of course.

IMG_4070.JPG

Potential Competition?

I was totally sizing up the competition when I took this photo.  Do you think they have the imagination to make this place great?!

IMG_4074.JPG

Mid Section of the Parlor

See how tall the ceiling really was without being blocked by sectional compartmental walls

IMG_4072.JPG

Bath

Arrg!

IMG_4075.JPG

Garden Floor Living Room

The house removed its stoop and added a ~200sf extension in front, you can see exactly where the extension was added by the demarcations in the floor finishes and the difference in ceiling height. AND what's up with the pebbled stucco again??

IMG_4076.JPG

Garden Floor Living Room

I guess after you pass through the door, the bedroom was place in the middle of the floor plan with very little sunlight

IMG_4073.JPG

Kitchen

Wow, I can imagine how stuffy this room can get especially when I am deep frying my thanksgiving turkey!  There is actually another window buried behind those cabinet walls


May' 17

27


Let the demolition begin!

We closed on the house in April and began drawing the floorplans, filing for permits (who knew this monster is landmarked?) then the demo started on May 1st!  By the end of May, we took a series of photos for everything we ripped out. The house is just an empty shell waiting for magic to happen!


1208-8th-ave-floor-plans-web-color-2b-1024x1024-1.jpg

Three story floor plan for demolition

Demolition

We decided to completely gut the house and left nothing but the shell, so we can build a totally modern interior to fit our needs.  I am trying to keep the photos in the same order throughout, so you can see side by side what transformations each room went through.

IMG_4700.JPG

3rd Floor Bedroom

Ceilings and walls completely ripped out, my architect husband is discussing the central AC system with the crew and how the pipe plans will look like.  We decided to remove the old boiler system (that wasn't working anyways) and replaced the heating using Mitsubishi central heating/AC

IMG_4701.JPG

3rd Floor Bedroom

Last look of the floor baby! We are taking the warped floors out to realign them completely.

IMG_4840.JPG

Stairway to the 3rd Floor

Or used to be the stairway and a portion of the door? The floors are being ripped out, you can see through the beams!

IMG_4845.JPG

Parlor Floor

Not sure if it's the underfloor or the actual floor here.  The staircase will go soon and so is the tiny window in the back.  We plan to knock down the entire back wall facing the garden and install large steel windows

IMG_4841.JPG

Reflooring the Garden Unit

Salvaging the beams and the fireplace.  The new wide plank floor will be even and uniform in color.  No one will be able to tell that it was an extension from the interior

IMG_4842.JPG

Garden Level Fireplace

A closer look of the defunct fireplace.  The low ceiling makes it harder to ventilate the smoke fire, we decided to only keep the fireplace for the looks rather than reviving it


May


IMG_4852.JPG

Preserving the Brick wall

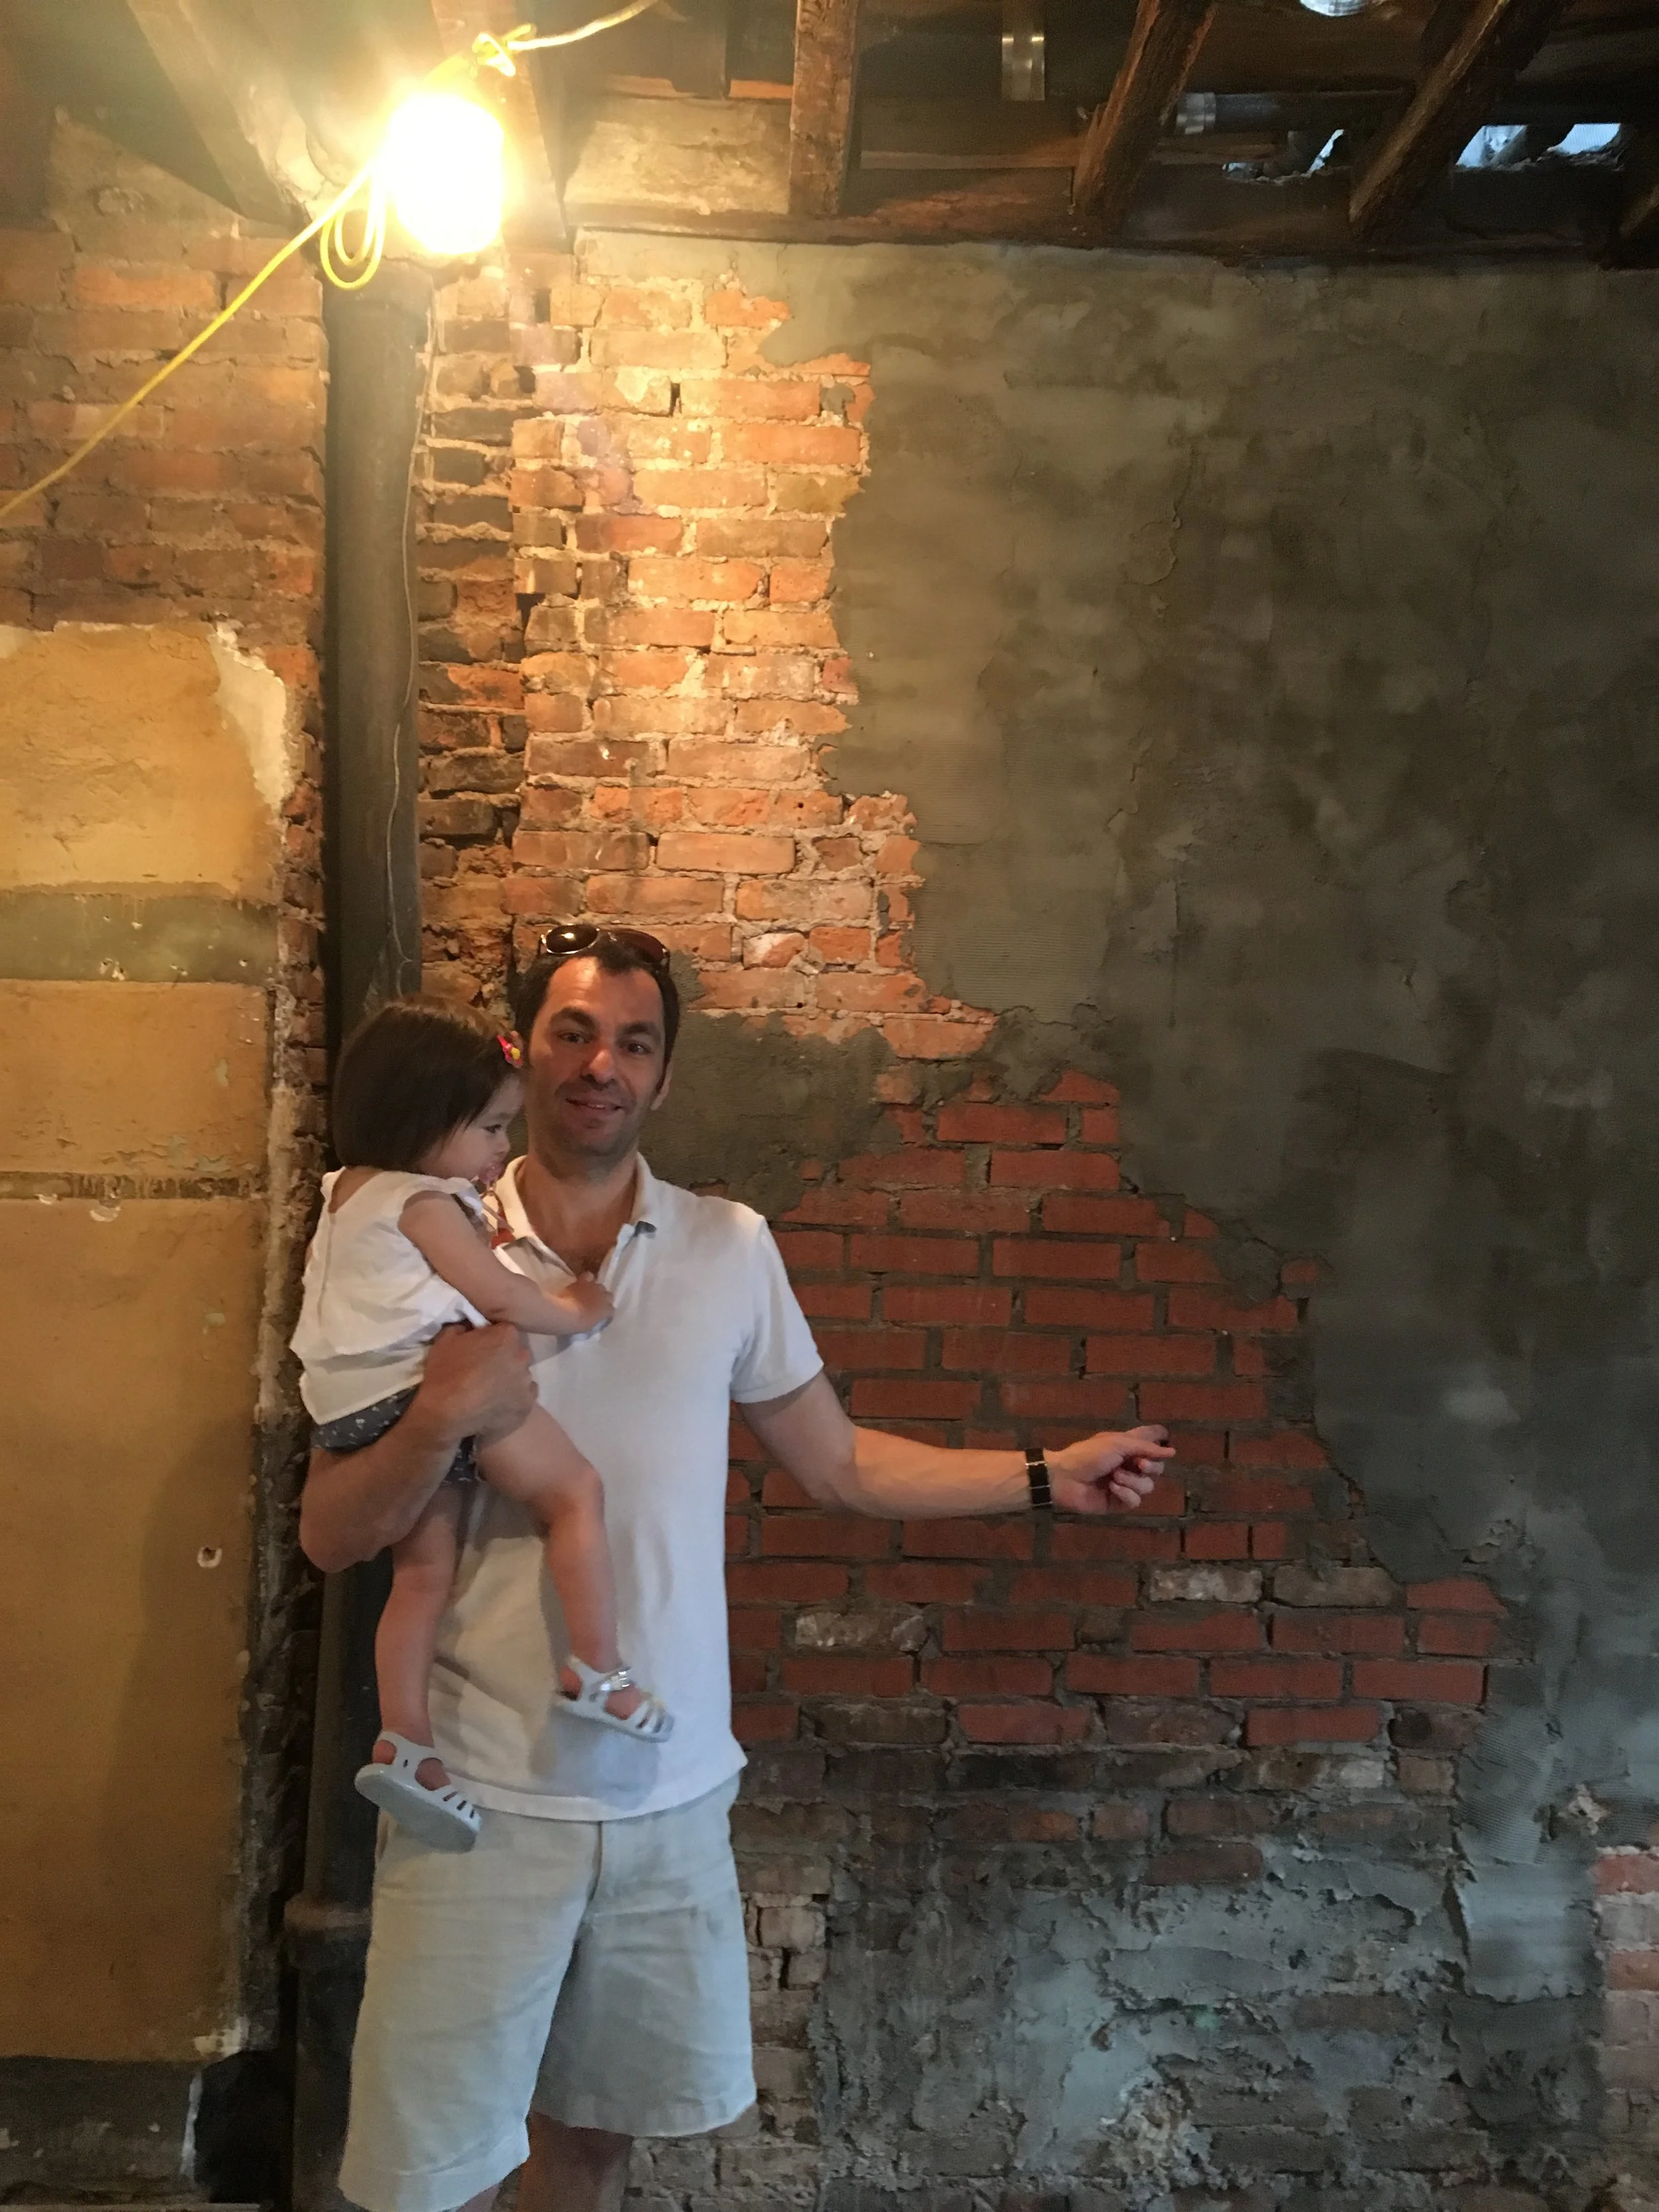
It's kind of a shame to buy a historic house without leaving any original details, even though the house came with very little of them left.  During the demolition process, we discovered that some of the brickwalls are actually intact and could be shown to expose beautifully.

IMG_4854.JPG

Garden Floor Brickwall

Some walls were falling apart after we took out the old dry walls, they wouldn't be good candidates for exposed brickwalls.  This garden floor fireplace had to be reinforced with new cement for example.

IMG_4856.JPG

Parlor Floor Brick Wall

part of the walls in the Parlor actually caved in after we uncovered them, we had to put in new bricks to support the frame.  You can see the color difference here

IMG_4936.JPG

Shahab

Our wonderful brickwork was done by Shahab here, who worked tireless to repoint and reinforce all the brickwalls.  You'll see the beautiful exposed brickwall he did for us later!


June' 17

3


Full Speed Ahead..

It's been a month since demolition started, we are in full speed ahead. The construction already has filled two large containers with all the stuff we are ripping off the house.  Old floors, dry walls, damaged bricks.  Inch by inch, we are refitting the 1860s house with modern amenities


Framing

After pulling out all the old structure, fixing the walls, laying down the foundation of the house, it's time to frame the interior layout and decided where the rooms will be.

IMG_4918.JPG

Empty Shell - Garden

IMG_4922.JPG

Empty Shell - Parlor

IMG_4921.JPG

Empty Shell - Top Floor

Just to show you how much we took the house apart.  At this point, I could stand on the ground floor and look straight up to the roof (with holes!).  Good thing it was the middle of June and no snowstorms!

IMG_4867.JPG

Remnants of the Old Boiler

Since we installed the modern AC system, there is no need of this old cast iron heater

IMG_4920.JPG

Fireplace Collapsed!

There was a little accident during construction.  The old chimney gave in and collapsed.  Luckily no one was hurt, that's why there is a hard hat rule on site.  We ended up reinforcing the top floor fireplace to ensure safety

IMG_5358.JPG

Top Floor Framed for Future Bedrooms

Top floor will have one master en suite, two small bedrooms and one more guest bath


June


IMG_1333.JPG


Aug' 17

5


Oct' 17

31


Nov' 17

10


Dec' 17

13


FInishing Touches

It's December, six months after we started demolition.  Our goal is to move in by Christmas, so the count down is on!  We now have a fireplace, but no one can live on just one fireplace.  Will need working bathrooms, I hope!

IMG_5361.JPG

Framing the Bath

IMG_5362.JPG

Opening up a Skylight

IMG_6548.JPG

Tiles, Tub and Toilet!

We are trying to jam two baths into the narrow floor plan, to serve three bedrooms on the top floor.  This means I won't be able to get one of those huge luxurious clawfoot tubs, but the fact that I have two baths totally increases the utility factor.

To compensation for tiniess, we tried to bring in a lot of light. Rain shower under the skylight is a makeup for the loss of clawfoot tub.  I'll do that trade! 

We picked marble subway tiles for the guest bath, to stay in the neutral color tone but with a subtle pop in texture.  Those marble tiles came out beautifully!

IMG_4930.JPG

Custom Handcarved Handrail

IMG_4620.GIF

Custom Screen Against the Exposed Brick

IMG_4673.jpg

Exposed Brickwall under Gallery Lighting

Our carpenter Stephen from South Carolina showcased his superb craftsmanship here with this custom handcarved railing.  He added a maple sectional in the middle of the handrail bar to both stabilize the handrail and add subtlety in texture

Stephen custom made the screen for us.  It's only partially installed here, but already looks so good against Shahab's whitewash exposed brickwall

Another look from the top floor.  The screen was extended upward to form the upper handrail for the top floor. We added gallery lighting (in soft white 2700k) to enhance the look and the texture of the woodwork against the brick.

IMG_3356.jpg
IMG_3358.jpg
IMG_7322.JPG

Installing Custom Cabinets

On two separate occasions, Stephen flew in from South Carolina to install the cabinets for us.  All the drawers, hidden compartments and storage space were made to measure in maple and then stained in espresso color to match the screens in front of the stairs

IMG_5669.JPG

Garden Level Kitchen

IMG_5663.jpg

Garden Level Kitchen

IMG_3804.jpg

Garden Level Bath

Since there are only three of us, we decided to make the garden floor a rental in farmhouse style

We picked a light green color for the cabinets and set them against the brushed gold handles and subway tile backsplash

Since it's farmhouse style, we tried to have more fun in the garden unit compared to the monochromatic upper duplex.  Color cement tiles made an interesting pattern for the bath floor

December

1208_1451-g-1.jpg


Master Windows

Few things are lying around waiting to be installed, such as this beautiful Venetian mirror I won on 1st dibs

The master bedroom also got new windows, the frames will have to be painted........


Hidden Powder Room

This is one of my proudest design, a speakeasy style hidden powder room, in the parlor floor, painted in Hearthrob with Madeleine mirror and rabbit hook from Anthropologie


Parlor Entry / Dinning Area

In the very beginning of the planning stage, I knew I wanted to knock down the back walls and install floor to ceiling steel windows overlooking the yard.  So we reoriented the living room space towards the back of the house to take advantage of the sun exposure from the large steel windows.  This left us to position the dinning area toward the front of the house and by the entry.  To preserve the intimacy of the dinning space, we added a partition by the stairs in the same style as the wooden screen for the main stairs. 


Another Look of the Dinning Space

Light fixer from AllModern, Caroll Farm Table and single bench from West Elm, Visor strawberry helmet from Bern


March' 18

30

The runners finally arrived!  I guess I showed my colors by selecting an animal print to juxtapose the all-lines-and-angles of the monochromatic modern kitchen.  The coffee and beige palette fits surprisingly well with the screen and the wood flooring.  Not to mention it matches my tiger striped kitty!

Runners are from Rugs Direct, this is the Liora Manne Seville Zebra style


April

IMG_6589.jpeg
IMG_7554.jpg

Master Bedroom

IMG_7555.JPG

Walk In Closet in Master Bedroom

IMG_7557.JPG

Tiny Bedroom for A Tiny Person

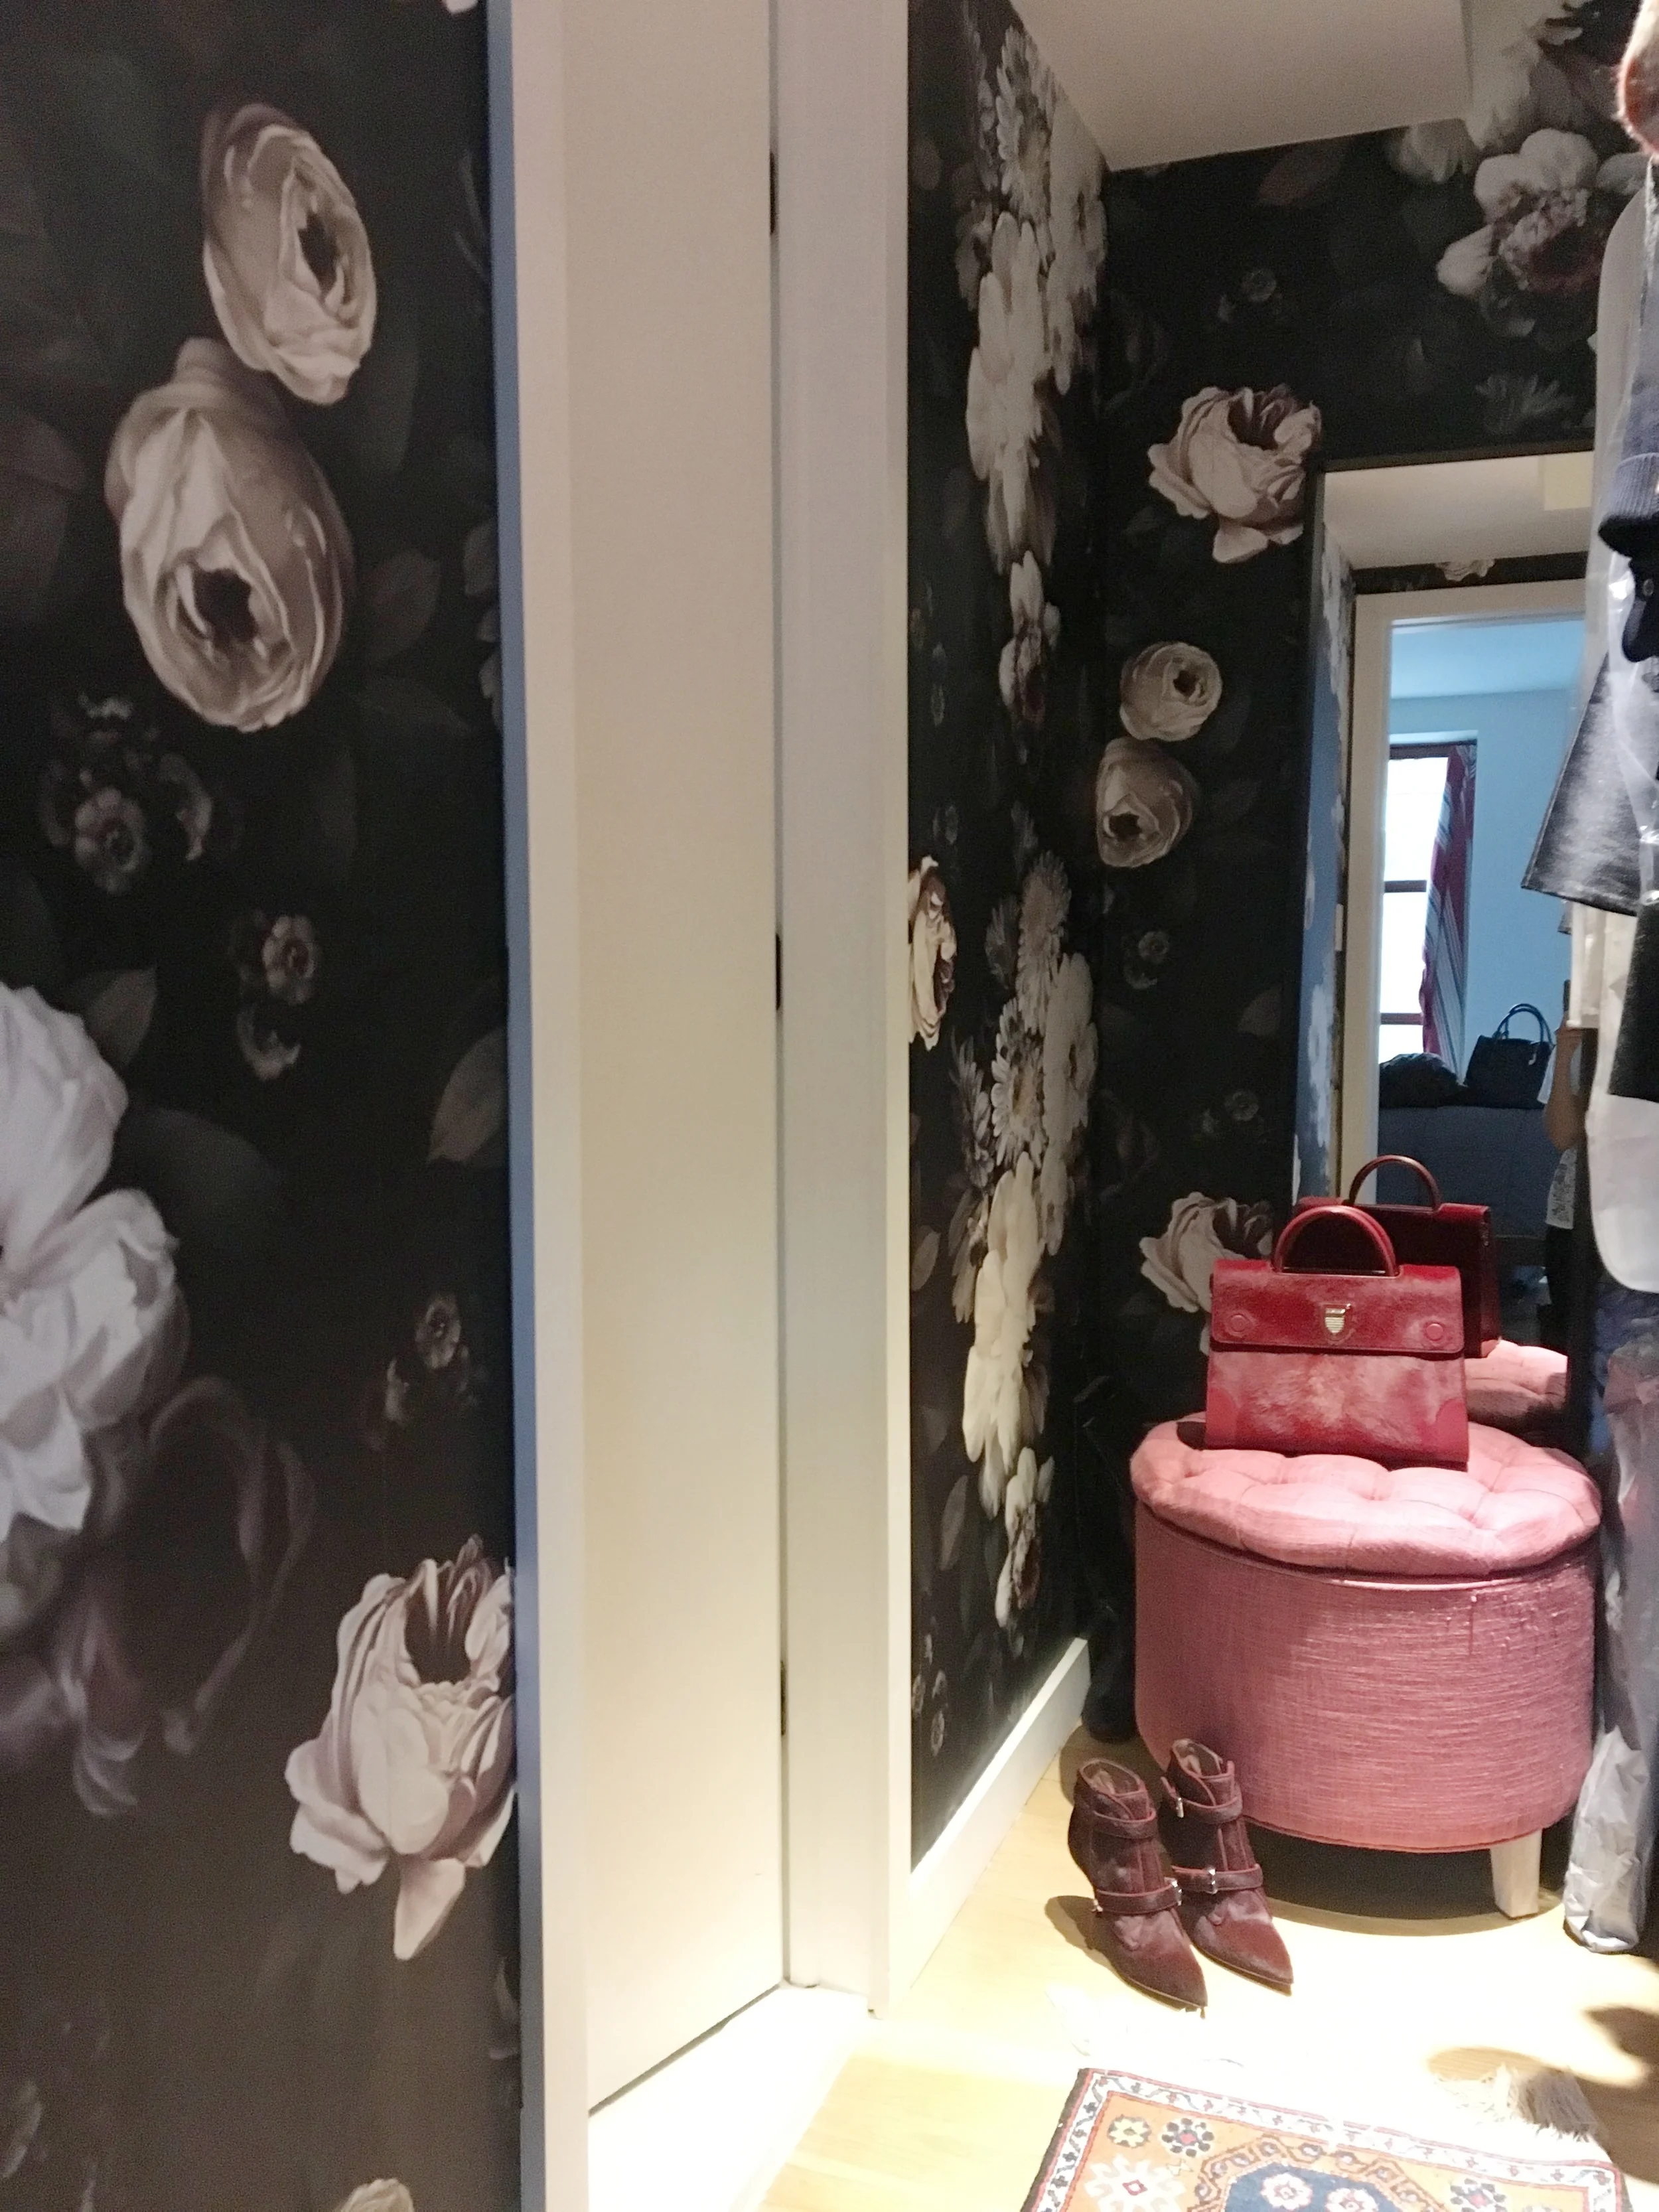
Now I know that this looks like a bedroom for the cat, but it's actually the master.  The wallpaper was in Dark Floral from Ellie Cashman Design

The walk in closet is attached to the Master Bedroom to the right, and by extending the beautiful wallpaper all the way into the closet, I get to build on the theme a little bit more.  The Dutch masters inspired pattern is such a feat to stare at, I didn't mind seeing more of it

We didn't have enough space to build three normal size bedrooms, a 16 footer is a small floor plan after all.  So Olivia's bedroom is tiny, but we took advantage of the higher ceiling at the front of house (the roof slants downward towards the back) and the bright sunny exposure.  Wallpaper was Bellewood from Rebel Walls

April ‘20

IMG_4799.jpeg

A work in Progress

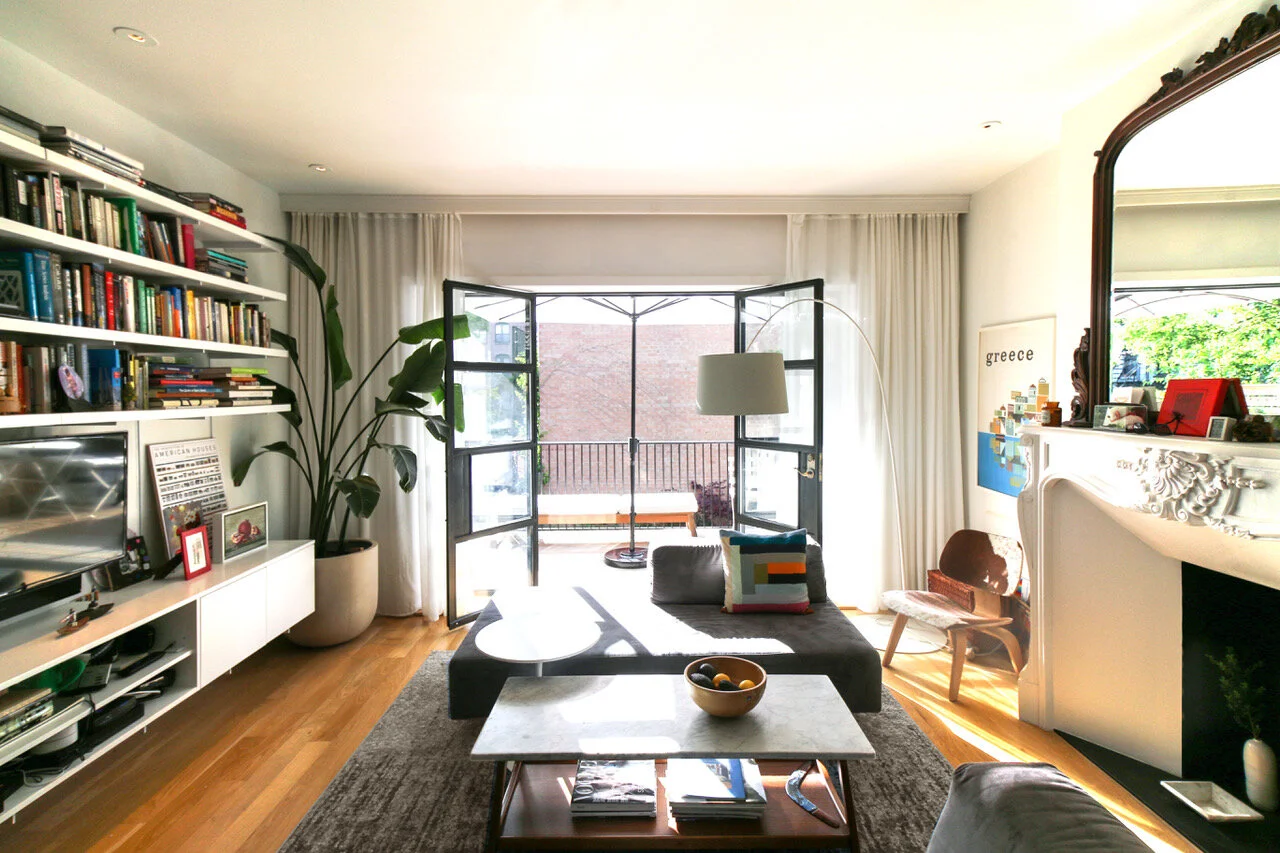
We are slowly transforming the rest of the space as budget allows, now we are moving beyond the essentials. Steel windows were always in the plans, with a deck extending out the parlor into the yard and of course planting, more planting….

IMG_6563.jpg

June ‘20

IMG_4811.jpeg

Garden

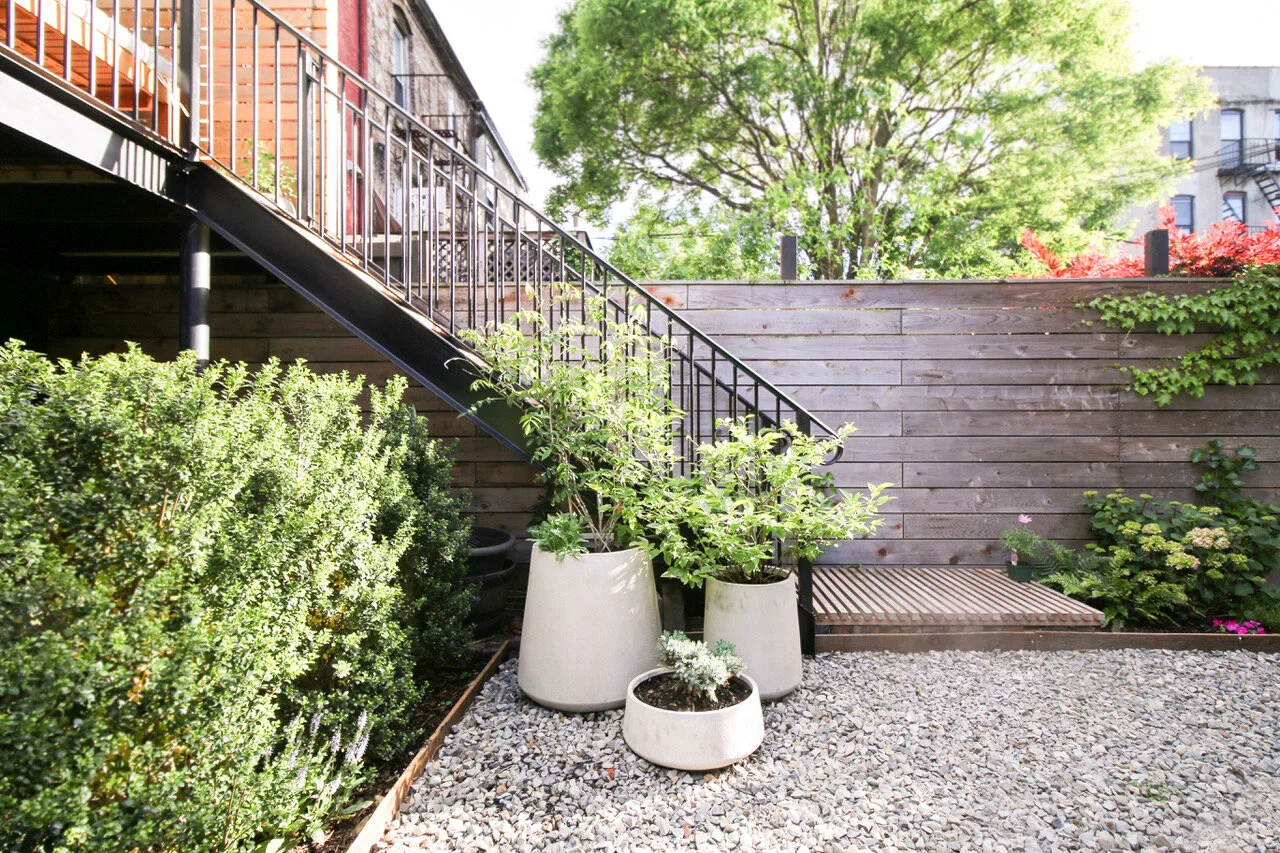
It’s almost impossible to photgraph a garden well, until it’s in full bloom and envelopes in lush shades of green. The wooden cedar planks used for fences also started to lose its orangey surface oil and turning nicely grey, giving them a weathered look, like everything is all grown in.

But let’s not forget how far this place has come. Enjoy the before and afters!

 
Backyard.jpg

Original Entry to Yard

Fences.jpg

Original Fences

Backdoor+to+Yard.jpg

Old Aviary

This yard was partially used as a aviary and a dog run! That’s why most of the outdoor space was covered with corrugated plastic sheet

Country style pickets plus barbed wire, who can say punk fast enough?

Hope you catch the theme, if not, just stare at those bird-pattern decor a bit longer, you’ll get it….

IMG_2727.jpg

Use Anchoring Plants to Provide Structure

IMG_2723.jpg

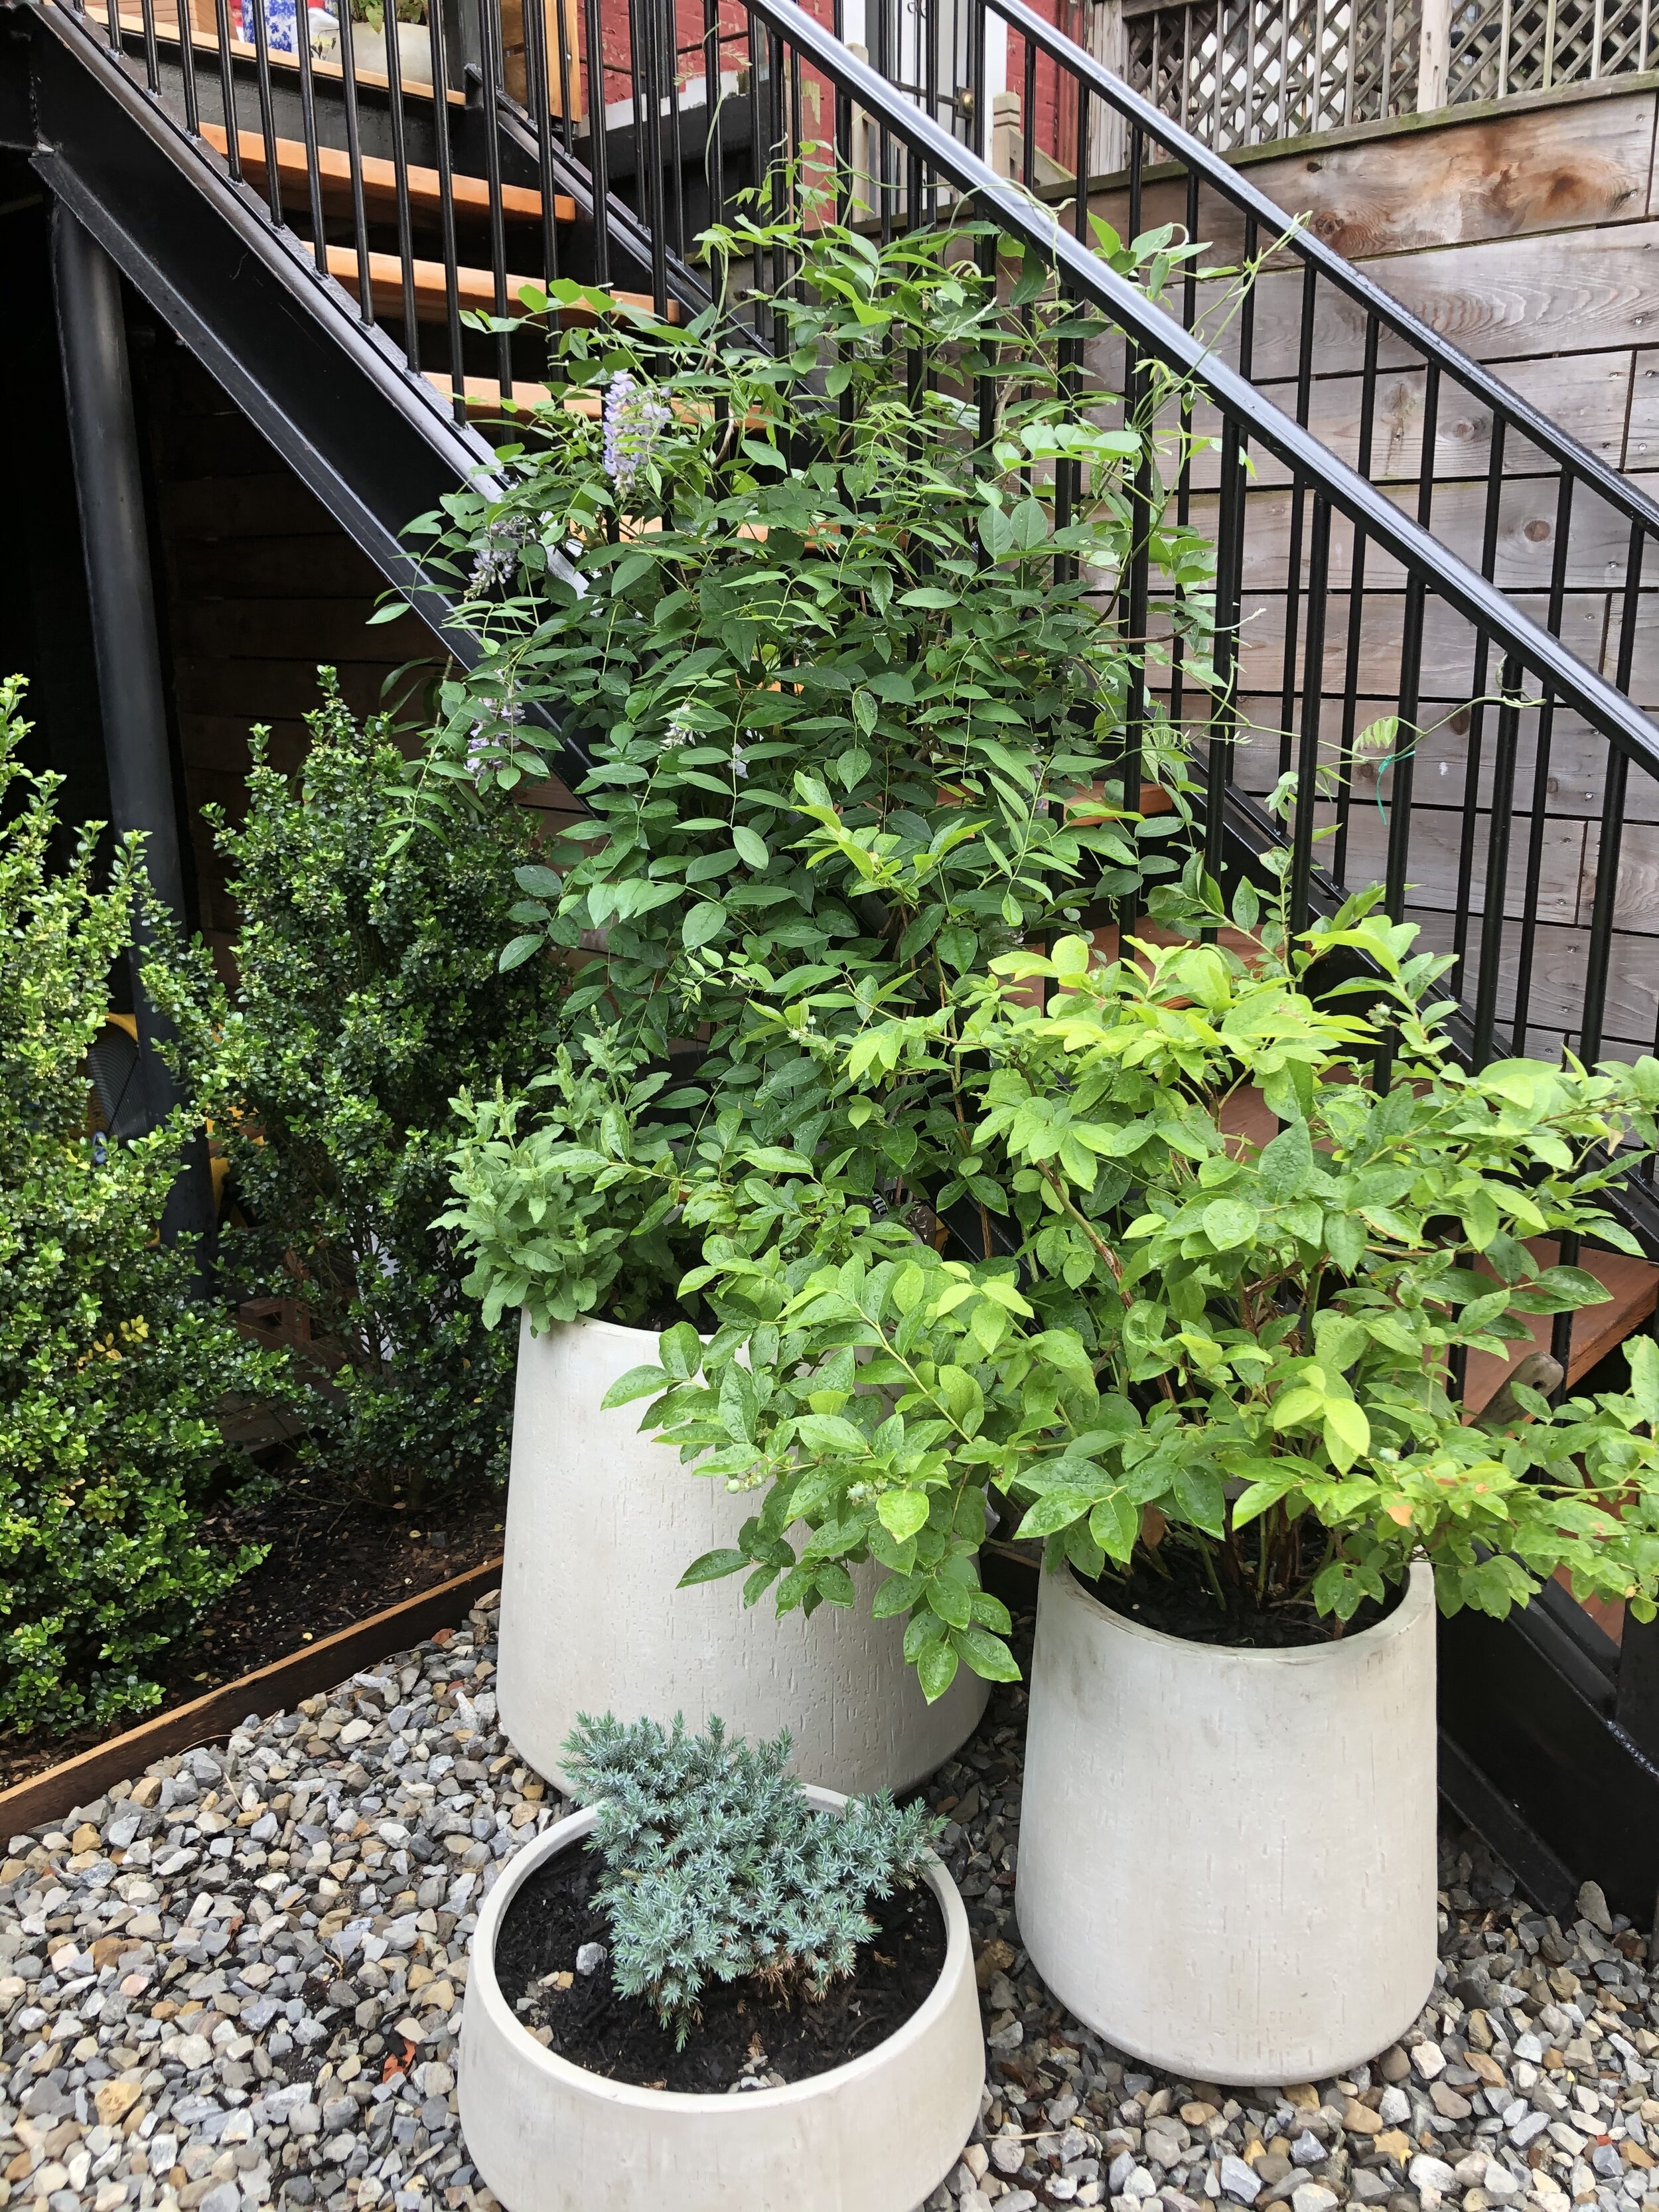
Container Garden Adds Vertical Variations

IMG_2724.jpg

New Deck for the Parlor

The gravel has always been a work in progress, we are testing out new pavers at the corner. My hydreangea is finally blooming and the grass is cat Lola’s hide out spot while tailing squirrels.

It’s my dream to have wisteria climbing on the side of the house. The newly installed steel staircase is just the right place for these Blue Moons to start

Looking nice and still has plenty of birds visting us

IMG_2726.JPG

Feb' 17

7

June' 20

8


IMG_4833-2.jpeg


image0.jpg